
Introduction
Hi Dear Readers, hope you all are safe and doing good. So, I welcome you all to the blog post on Docker Build Stage Security Best Practices. The title might be confusing to many since in this blog post we won’t be looking at attacking or pentesting Docker Containers but we’ll look at defences and best practices to protect docker containers from security issues. We’ll be discussing various security best practices such as Avoiding root user accounts, Copying only the needed files, Use of multi staged builds and many more. We’ll be gradually improving our Dockerfile and build a docker image with better security by the end of this post. This blog post actually was my notes that I prepared while doing the Course by @srini0x00. The link to the Course will be listed below the post. If you want a detail explanation of each topic covered in this blog, I would totally recommend to look at his course. So, without further a do, let’s begin the post.
Introduction to Docker Containers
I will not be delving deep into what is a docker or how it works but will give you very short brief idea about it. There used to be one time when developers had to face a lot of dependency issues. Their code would work totally fine on their computer but the same program would break when run on different computer. The answer is obvious that the dependencies or libraries the other computer is using is not necessarily same as the one on which the program was built. So, the docker addresses this issue. Docker allows us to wrap our code, dependencies, libraries, files or anything that’s required by the program inside a container and this container is portable. The other computers are only required to have docker installed in order to run this container. It might sound like Virtual Machine but there’s notable difference aside from the fact that docker containers are very light weight in comparison to the virtual machines. I believe the below image would be enough to clear the difference between them, If not please do some more research on it.
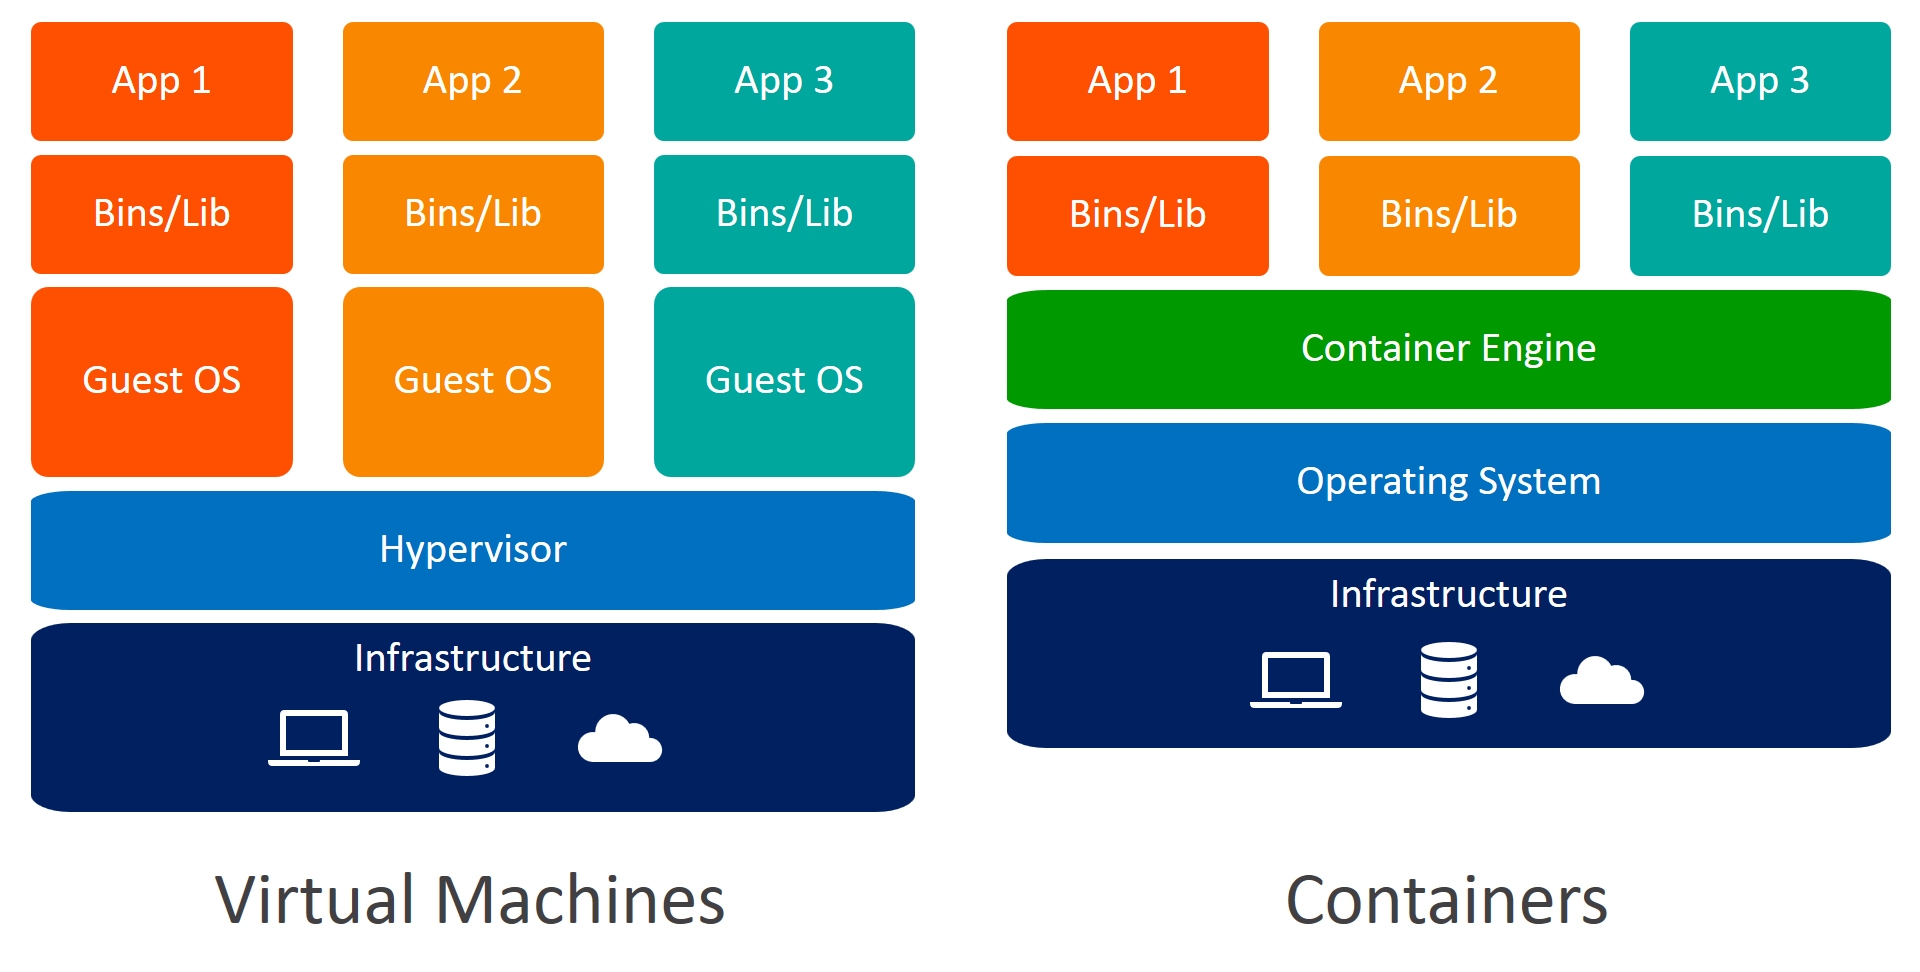 **Source: ** https://www.weave.works/blog/a-practical-guide-to-choosing-between-docker-containers-and-vms
Lab Setup and Docker Installation
By now I am assuming that you all are ready with your Linux instance. In my case I’ll be using Kali LInux 2021 but you can use any linux machine. We’ll be installing Docker and bulid our basic non-secure docker image. Most of you might already have docker installed. I’ll be referring the official docker documentation to follow the installation steps and I recommend the same to all of you. You can select your version of linux from the link and follow the steps accordingly. https://docs.docker.com/engine/install/ In my case, It’ll be Debian. First let’s check if we’ve docker already installed by typing docker in the command line. 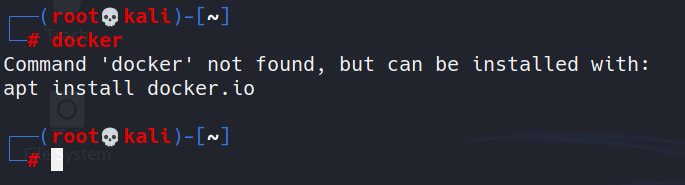
As can be seen, it’s not installed for me. If you have it installed and want to install it again from the beginning, you can uninstall it by:
1
sudo apt-get remove docker docker-engine docker.io containerd runc
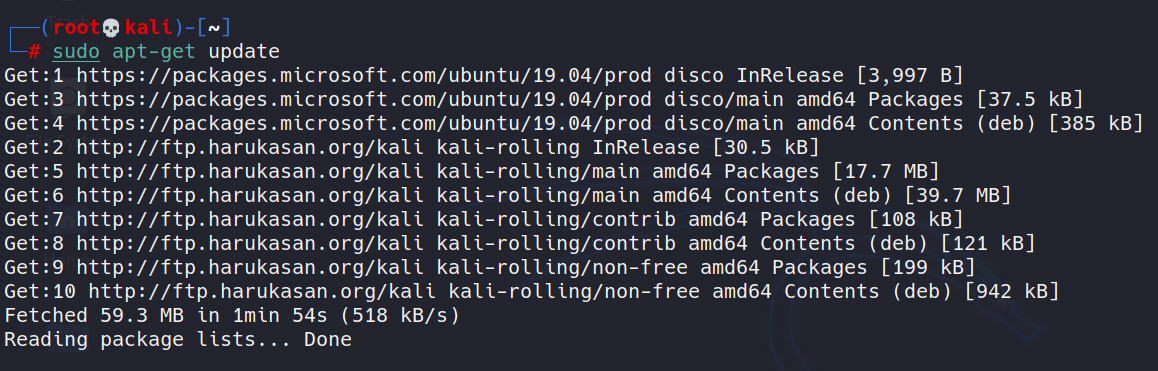
According to the documentation, first I must update my apt repository.
1
sudo apt-get update
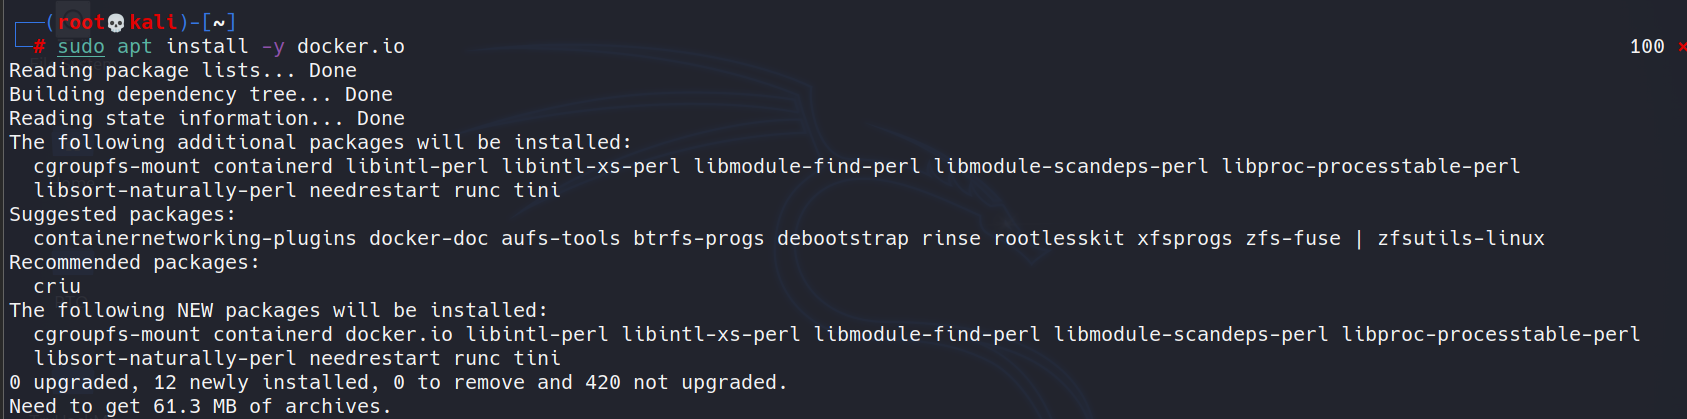
You can also directly install docker from the apt repository.
1
sudo apt-get install -y docker.io
Once you have installed Docker, you can run:
1
docker run hello-world
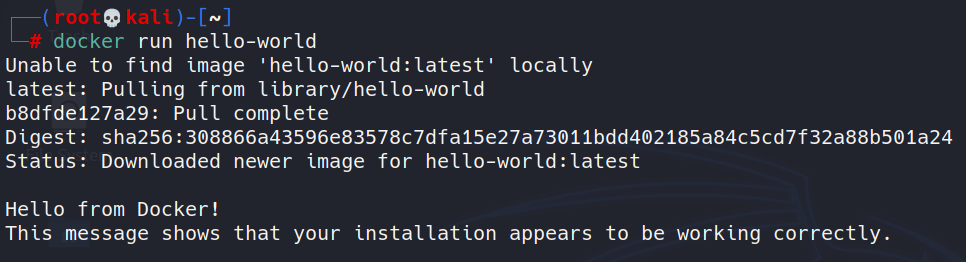
Now we know that docker has been successfully installed on our machine and now we can proceed further. We are running docker commands as the root user. If we want to run docker being any other user, we must add him/her to Docker group.
1
usermod -aG docker dazzy
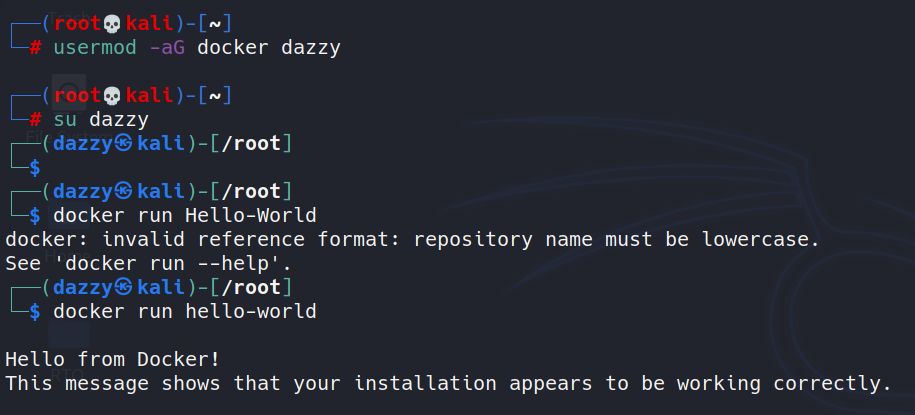
Here I added myself(dazzy) to the docker group and now I can run docker commands without having to put sudo before each command.
Need for Build Security
When building a docker image, we use a file named Dockerfile which contains all the build instructions. Once the image is built, Containers are launched from these images. 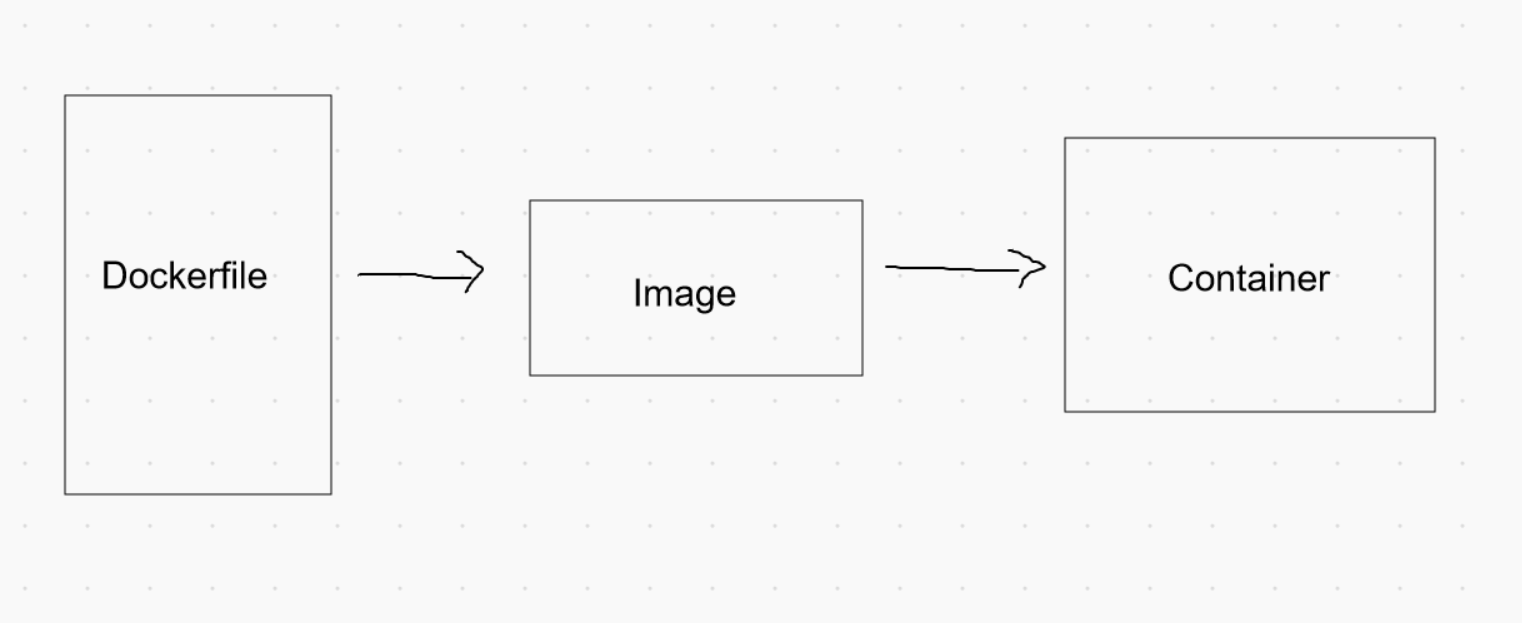
Apologies for my drawing :P Many people think that containers are the ones that need to be protected. However, the security starts from the Dockerfile itself. When writing these Dockerfiles, we have to maintain security hygiene. It is important for developers to follow security best practices to avoid any security pitfalls in running containers.
Building a Basic Docker Image
We are going to write a simple API in python-flask, a Dockerfile to write the build instructions and will finally build the image and run it.
1
2
3
4
5
6
7
8
9
10
11
12
13
14
15
from flask import Flask
from flask import request
import subprocess

app = Flask(__name__)

@app.route("/encode", methods=["GET"])
def encode_data():
    user_input = request.args.get('input')
    command = 'echo' + user_input + '| base64'
    output = subprocess.check_output([command], shell=True)
    return output

if __name__ == '__main__':
    app.run(host='0.0.0.0', port=8080, debug=True)

Many of you might already be like “Wait a minute, why are you making us write a vulnerable python API program”. Yeah Yeah, you are correct. It’s only to explain the security measures that we’ll be looking at later. If you don’t know what this program does, it takes user input from the API endpoint /encode using the GET parameter input and passes that input to the command which encodes our user input to base64 encoding format and then we are passing it to subprocess’s check_output method which executes the command which is also including our user input.
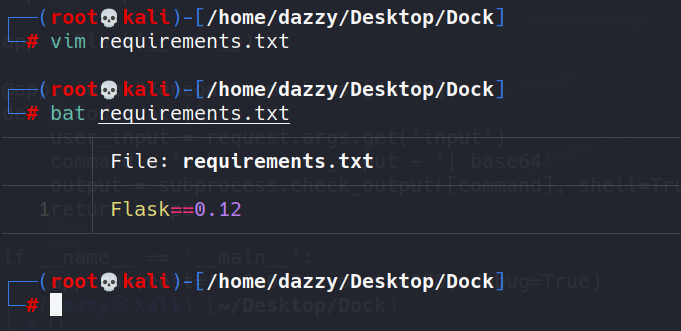
Since it’s a flask api, we also need to install the Flask package. We’ll create a requirements.txt file and put the package name there and will ask pip to install the package we need.
Let’s now create our Dockerfile. Since we’ll be creating multiple Dockerfiles, I will be naming them Dockerfile1, Dockerfile2 and so on since there’s no restriction on the naming. Let’s build our first Dockerfile:  ***
***
In the first line, we are specifying the base image on top of which our application will be packaged. Since this is a python3 application, we are going to use python3 base image.
The second line is just the description for Dockerfile.
Third line is to create a virtual python environment. The main purpose of the virtual environment in python is to create virtualized environment for python projects. We can run any system commands using RUN.
In Fourth line, we are setting environment variable PATH to also include the python’s virtual environment path we just created above.
In Fifth line, we are creating a directory named /app inside container where we’ll place our code and files associated with it.
In Sixth line, we are copying api.py and requirements.txt from the current directory to the container image’s /app folder so that the dependency like Flask can be installed at runtime.
In Seventh line, we are changing our current working directory inside container image to /app directory.
- In eight line, we are running pip3 to install the package names inside the requirements.txt file.
- In tenth line, we are specying our entrypoint i.e., to run python3
- In eleventh line, we are specifying the arguments to our entrypoing program i.e., api.py code.
Let’s now build this image.
1
2
docker build -f Dockerfile1 -t api:v1 .
// we are specifying the tag named api:v1 to the image
 [..snip..]
To see if our image build was successfull, we can run docker images to see available images. 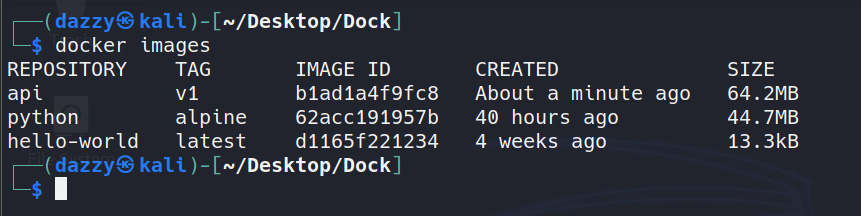
So our build was successfull. We finally created our first Docker image. This docker image we build is not fully secure and can be more improvized which we’ll be see going forward.
The use of root accounts
When a container is started, a root user account will be available within the container by default. 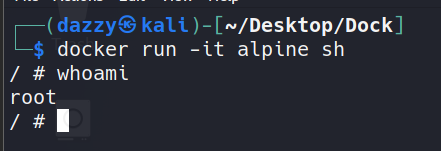
Even though these accounts on Docker container do not come with all the capabilities that a traditional root user has, It is recommended to use a non-root user within a container. One way to avoid this is to specify –user flag with Docker command to use a non-root user within a container. 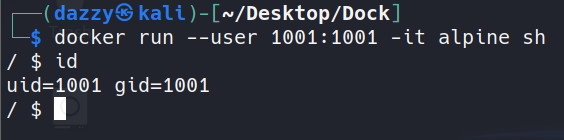
Another way is to specify USER command inside the Dockerfile itself. 
So we solved this problem during the build stage itself.
Our python program is currently running as inside the container. 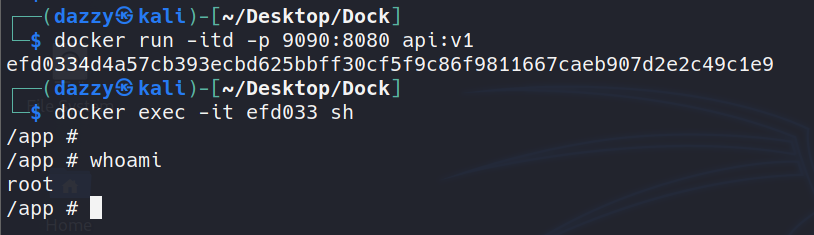
So, anyone who compromises our program will have root access to the container. 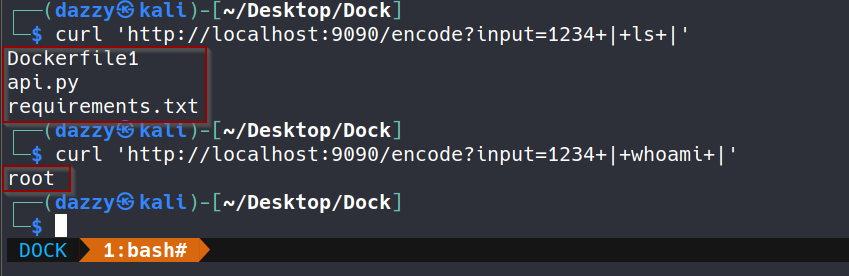
So let’s fix this in our Dockerfile. We’ll be creating a second Dockerfile which will avoid running the container as root user. 
In our new Dockerfile, we created a user named user and gave him the ownership to the /app directory and gave 755 permission to the /app directory and then changed the user context of the container image.
Let’s now build this image. 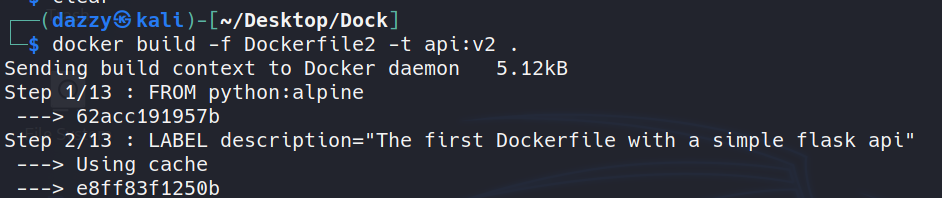 [..snip..]
Let’s now run this container image. 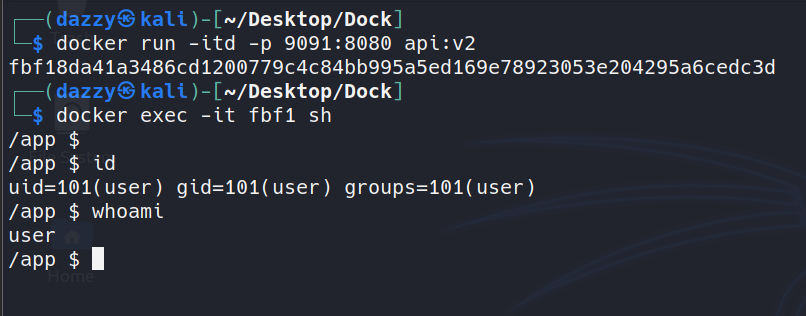

As can be seen, now it doesn’t give the root user anymore.
COPY only what is needed
As we saw, the COPY command is used to get the contents onto the image’s directory. One commonly seen practice is copying everything in the current directory onto docker image.
1
COPY . /app
This can be risky especially when the current directory has some sensitive files such as secrets or backup files. It is also possible that we may copy files onto container which are not needed such as the Dockerfile. 
Copying such unnecessaries files onto the container image can increase the file size of the final image.
Let’s fix our Dockerfile to only copy the file that’s needed. 
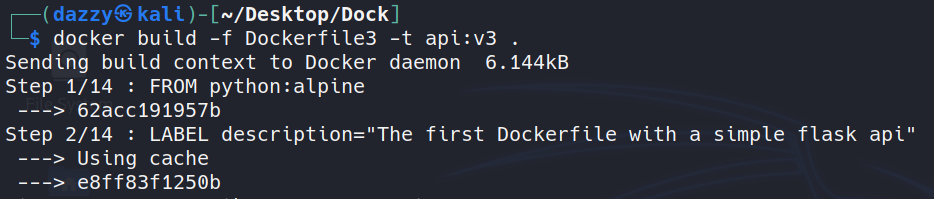 [..snip..]
Let’s now run the container image. 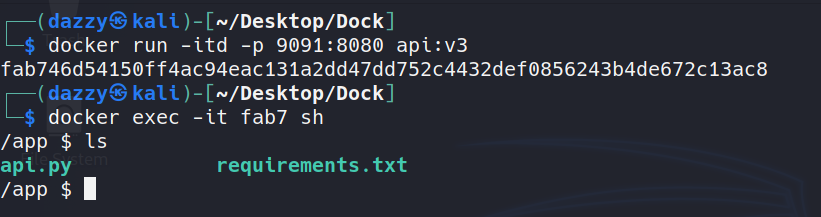
As can be seen that this time our Dockerfiles were not copied. Those files were only copied which we explicitly specified.
Dangers of using ADD Command
ADD and COPY commands are used to achieve similar goal i.e., get content while building the image. COPY can only copy files from local directory but ADD can be used to additionally download a content from URL during the build time. Content maybe loaded from an untrusted source. It can also lead to broken builds especially if the URL used with the ADD command is not available anymore or the link is broken.
Avoid untrusted base images
The FROM command gets the base image while building custom images.
1
FROM alpine:latest
if the image is being pulled from an untrusted resource, most likely the image may contain vulnerabilities or backdoored code. It’s best practice to avoid pulling images from untrusted sources.
Docker Hub provides official images of the msot popular OS - Ubuntu, CentOS.
1
https://hub.docker.com/search?image_filter=official&type=image
Official images are trusted and free from malicious behavior and Security Updates are applied in timely manner for them.
Use Minimal base images
As we saw that the FROM command is used to get the base image on top of which our base image will be built. When images are built using dockerfile, it’s recommended to use base image with minimum tools and utilities. If we can, it’s better to use scratch images. As large number of tools and libraries will not be present in the contaner, it’ll automatically minimize the attack surface.
We can see the list of programs installed inside our container image.
1
2
3
4
5
6
7
8
9
10
11
12
13
14
15
16
17
/app $ ls /usr/bin
[            cmp          expr         head         lzma         openvt       reset        ssl_client   ttysize      vlock
[[           comm         factor       hexdump      lzopcat      passwd       resize       strings      udhcpc6      volname
awk          cpio         fallocate    hostid       md5sum       paste        scanelf      sum          unexpand     wc
basename     crontab      find         iconv        mesg         pgrep        seq          tac          uniq         wget
bc           cryptpw      flock        id           microcom     pinentry     setkeycodes  tail         unix2dos     which
beep         cut          fold         install      mkfifo       pkill        setsid       tee          unlink       whoami
blkdiscard   dc           free         ipcrm        mkpasswd     pmap         sha1sum      test         unlzma       whois
bunzip2      deallocvt    fuser        ipcs         nc           posixtz      sha256sum    time         unlzop       xargs
bzcat        diff         gdbm_dump    killall      nl           printf       sha3sum      timeout      unshare      xmlwf
bzip2        dirname      gdbm_load    ldd          nmeter       pscan        sha512sum    top          unxz         xxd
c_rehash     dos2unix     gdbmtool     less         nohup        pstree       showkey      tr           unzip        xzcat
cal          du           getconf      logger       nproc        pwdx         shred        traceroute   uptime       yes
chvt         eject        getent       lsof         nsenter      readlink     shuf         traceroute6  uudecode
cksum        env          groups       lsusb        nslookup     realpath     sort         truncate     uuencode
clear        expand       hd           lzcat        od           renice       split        tty          vi
/app $
As can be seen, there are many programs that are not needed for this specific case since there’s no shell interaction needed for our python api program.
We can also see the list of installed packages on alpine image.
1
2
3
4
5
6
7
8
9
10
11
12
13
14
15
16
17
18
19
20
21
22
23
24
25
26
27
28
29
30
31
32
33
34
35
36
37
38
39
40
/app $ apk list
WARNING: Ignoring https://dl-cdn.alpinelinux.org/alpine/v3.13/main: No such file or directory
WARNING: Ignoring https://dl-cdn.alpinelinux.org/alpine/v3.13/community: No such file or directory
sqlite-libs-3.34.1-r0 x86_64 {sqlite} (Public-Domain) [installed]
krb5-libs-1.18.3-r1 x86_64 {krb5} (MIT) [installed]
musl-1.2.2-r0 x86_64 {musl} (MIT) [installed]
libbz2-1.0.8-r1 x86_64 {bzip2} (bzip2-1.0.6) [installed]
libcom_err-1.45.7-r0 x86_64 {e2fsprogs} (GPL-2.0-or-later AND LGPL-2.0-or-later AND BSD-3-Clause AND MIT) [installed]
gdbm-1.19-r0 x86_64 {gdbm} (GPL-3.0-or-later) [installed]
libtirpc-conf-1.3.1-r0 x86_64 {libtirpc} (BSD-3-Clause) [installed]
tzdata-2021a-r0 x86_64 {tzdata} (Public-Domain) [installed]
ncurses-libs-6.2_p20210109-r0 x86_64 {ncurses} (MIT) [installed]
zlib-1.2.11-r3 x86_64 {zlib} (Zlib) [installed]
keyutils-libs-1.6.3-r0 x86_64 {keyutils} (GPL-2.0-or-later LGPL-2.0-or-later) [installed]
apk-tools-2.12.4-r0 x86_64 {apk-tools} (GPL-2.0-only) [installed]
libintl-0.20.2-r2 x86_64 {gettext} (LGPL-2.1-or-later) [installed]
readline-8.1.0-r0 x86_64 {readline} (GPL-2.0-or-later) [installed]
musl-utils-1.2.2-r0 x86_64 {musl} (MIT BSD GPL2+) [installed]
libssl1.1-1.1.1k-r0 x86_64 {openssl} (OpenSSL) [installed]
ncurses-terminfo-base-6.2_p20210109-r0 x86_64 {ncurses} (MIT) [installed]
alpine-baselayout-3.2.0-r8 x86_64 {alpine-baselayout} (GPL-2.0-only) [installed]
xz-libs-5.2.5-r0 x86_64 {xz} (GPL-2.0-or-later AND Public-Domain AND LGPL-2.1-or-later) [installed]
ca-certificates-20191127-r5 x86_64 {ca-certificates} (MPL-2.0 AND MIT) [installed]
libverto-0.3.1-r1 x86_64 {libverto} (MIT) [installed]
alpine-keys-2.2-r0 x86_64 {alpine-keys} (MIT) [installed]
libnsl-1.3.0-r0 x86_64 {libnsl} (LGPL-2.0-or-later) [installed]
busybox-1.32.1-r5 x86_64 {busybox} (GPL-2.0-only) [installed]
libuuid-2.36.1-r1 x86_64 {util-linux} (GPL-3.0-or-later AND GPL-2.0-or-later AND GPL-2.0-only AND) [installed]
libtirpc-1.3.1-r0 x86_64 {libtirpc} (BSD-3-Clause) [installed]
scanelf-1.2.8-r0 x86_64 {pax-utils} (GPL-2.0-only) [installed]
.python-rundeps-20210402.212232 noarch {.python-rundeps} () [installed]
ca-certificates-bundle-20191127-r5 x86_64 {ca-certificates} (MPL-2.0 AND MIT) [installed]
libc-utils-0.7.2-r3 x86_64 {libc-dev} (BSD-2-Clause AND BSD-3-Clause) [installed]
libffi-3.3-r2 x86_64 {libffi} (MIT) [installed]
libtls-standalone-2.9.1-r1 x86_64 {libtls-standalone} (ISC) [installed]
ssl_client-1.32.1-r5 x86_64 {busybox} (GPL-2.0-only) [installed]
krb5-conf-1.0-r2 x86_64 {krb5-conf} (MIT) [installed]
expat-2.2.10-r1 x86_64 {expat} (MIT) [installed]
libcrypto1.1-1.1.1k-r0 x86_64 {openssl} (OpenSSL) [installed]
/app $
Avoid latest tag
As we have seen that most docker images use base image of some sort by specifying the FROM command in the Dockerfile.
1
FROM alpine:latest
The above command will pull the latest base image. It’s recommended to avoid pulling latest tag since the latest tag is rolling and the underlying image with the latest tag can be different in future which may break the dependency of our program and it also becomes hard to track the version of our base image that we pulled earlier. We should use the exact version instead.
1
FROM python:3.9.1-alpine
There are more such security measures which I am not covering in the blog post since it’ll be like spoiling The Offensive Labs’ course and I neither want to steal the credit for his hard work and effort. So, Thank you all for giving your time to read this blog post. If you want to know more security measures and delve deeper into the topics, I would recommend you to get his course which is part of The Offensive Labs subscription.
Links and Resources
https://theoffensivelabs.com/p/all-course-subscription-pack
https://www.youtube.com/watch?v=-LeV_c1zG-s
https://docs.docker.com/engine/install/debian/
https://www.theoffensivelabs.com/p/hacking-and-securing-docker-containers